How to Use Pen Tool in Adobe Photoshop
In this tutorial I will teach you the basics of the Photoshop Pen tool, which allows you to create your own, custom shapes. We’ll pass through the basics of the tool, and we will pass through a series of short and easy exercises so that you can get the hang of it in no time!
As you might, or might not be aware of, the Pen tool is one of the few shapes in Photoshop that work with Vector Graphics. These kind of graphics are way better then raster ones because when you’re vector graphics, you got no quality to lose when scaling,
Overview

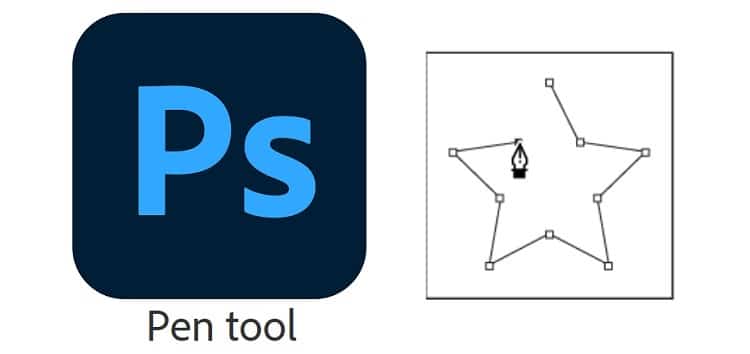
This is the preview of the Pen Tool as found in the toolbox. The shortcut for the Pen Tool is the P key on your keyboard and as you can see, the dropdown shows other four “sub-tools” of the Pen Tool. We will move on explaining those right now:
Pen Tool: The Pen Tool allows you to create straight lined, smooth curved paths and shapes (vector).
Freeform Pen Tool: is a tool that allows you to easy draw vector shapes and various paths by automatically adding anchor points.
Add Anchor Point Tool: is a tool that adds anchors and reshapes actual shapes and paths (which are shape outlines).
Delete Anchor Point Tool: is very similar to the previous tool, the only difference being that this tool removes anchor points.
Convert Point Tool: this tool edits existing shape masks and paths by converting smooth anchor points to corner anchor points.
We’ll move on to some practice, that’s why I ’ll snare the Pen tool and will produce a really simple shape. As you can see I created a triangle by placing 3 different anchor points, but to do that I’ve triggered the nonfeasance Photoshop grid (CTRL CTRL/ Command;). The grid is extremely useful when working with Shape/ Path tools resembling as the Pen tool because you have a clear representation of your workspace, divided into equal sections which comes really in- handy.
I ’ve used the Freeform Pen Tool to produce a shape made up of yards as shown on the screenshot. The Freeform Pen Tool is slightly different than the Pen tool because it does n’s allow you to manipulate that significant with shapes and is limited to straight lines/ yards.
As you can see the Freeform Pen Tool lets you produce some additional different kinds of shapes but keep in mind that there ’s nothing creative or complex you can come up with by using this tool. I made up the “ h ” and “ I ” letters by using that tool, but keep in mind that there’s nothing additional you can do with it.
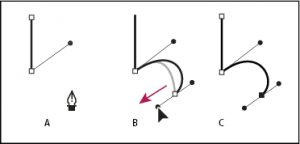
We’ll now move on to some Pen Tool practice. As you can see I’ve created a winding shape which is like easy to work. Trap the Pen tool and work an anchor point either work another anchor point and drag your mouse to the asked direction – that ’s how you’ll achieve this effect.
Another “sub-tool ” of the Pen Tool is the “ Add/ Cross Anchor Point ” which might sound confusing but really are n’t. As you can see on the first screenshot I’ve created a really simple path. By using the Cross Anchor Point tool I simply clicked on the lower left anchor point and it got deleted – simple as that.
Practice
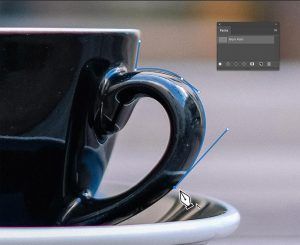
I have found this nice image of a green apple on Flickr, so I thought that it might be useful and i could use it in a project of mine. I can’t use the image with the background that’s why I have to cut the apple from the composition.

Grab the Pen tool, set the “path mode” to “Paths” and start passing around the apple shape. It’s very well simple and it’s much easier if you zoom in so that you can clearly see where you place your anchor points.
After you are done, just click do a right click on your mouse and choose “Create Vector Mask”. You can also go with “Define Custom Shape” but that way you will only get the shape of your object, not the “apple” itself. This technique is useful if you are thinking about creating shapes of peoples – vector silhouettes. Otherwise, just go with “Create Vector Mask” and your object will be “cut” from its previous document. Our result is not the most accurate but with some more practice and attention you can end up with a better result.