How to Control Gradient Fills in Adobe Illustrator
Grade fillings are used to catalyze transitions between colors. Most hourly they’re used to add volume to flat vector objects, creating light and shadow. The moment we’ll learn how to catalyze grades and control them.
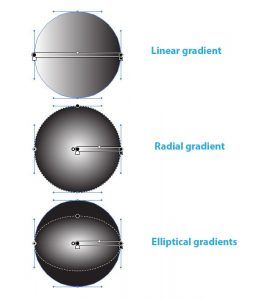
Adobe Illustrator has only two types of grade fills. These are right and radial grades. Radial grade can be converted into an elliptical bone. This kind of grade has been available since the release of CS4.
I would like to mention that other vector editors may have fresh types of pitches. For the prototype, CorelDraw has also Conical and Square pitches.
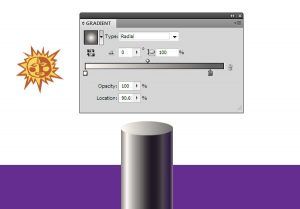
Pitch panel (Window> Pitch) and Gradient Tool (G) that can be introduced on the Tools panel, serve to control the pitch fills in Adobe Illustrator.
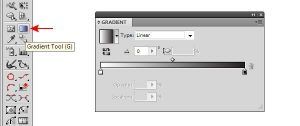
You can also control the gradient using the Gradient Annotator.
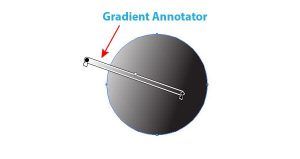
This particularity, as well as an elliptical pitch, has only appeared in Adobe Illustrator CS4. Pitch Reviewer becomes active only after you choose the Gradient Tool (G). For polychrome reasons, Pitch Reviewer may fly in the process, which is the cause of thousands of identical questions in illustrator forums. To turn on the Pitch Reviewer, go to View> Show> Gradient Reviewer or use Option/ Alt Command/ Ctrl G runs.
So let’s see how to apply a pitch and either know how to manage it. To apply a pitch fill to a named object, you should choose this type of filling on the Tools panel.
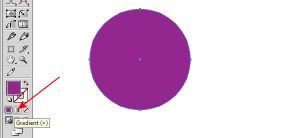
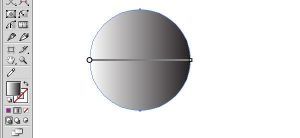
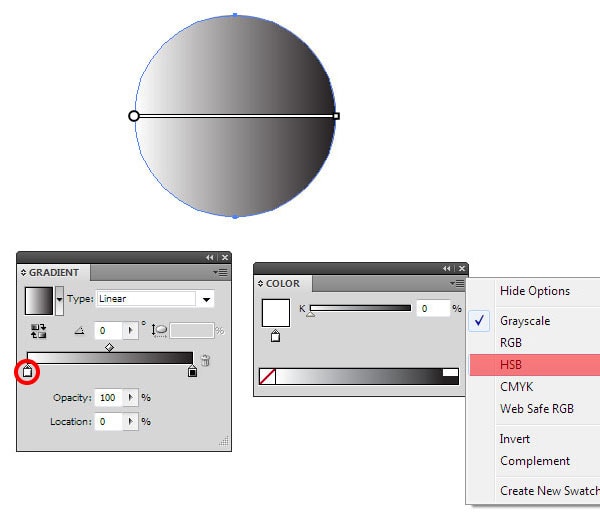
By default, this is a black and white linear gradient.
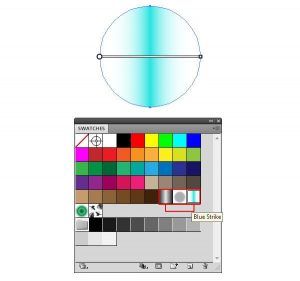
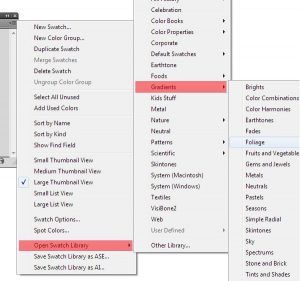
You can also use gradients from the Swatches panel or from its numerous libraries.
Personally, I prefer to start working with an incline fill from a black and white straight incline.
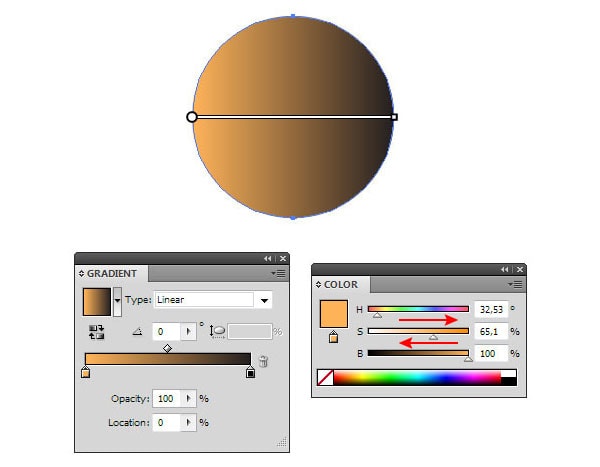
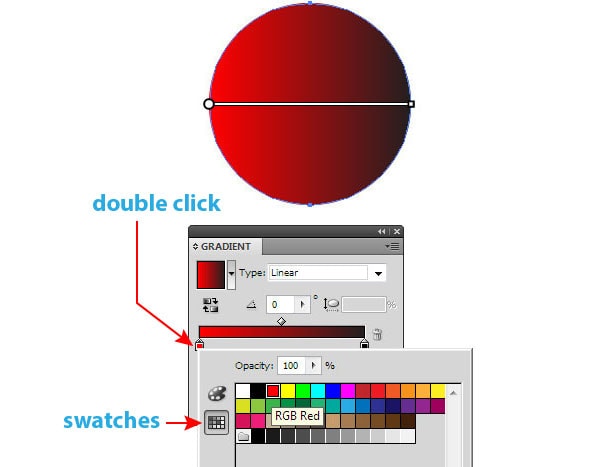
To change the color of the incline, elect one of its Color Stops in the Incline panel, either choose the color model in the Colors Panel and either set the asked color.
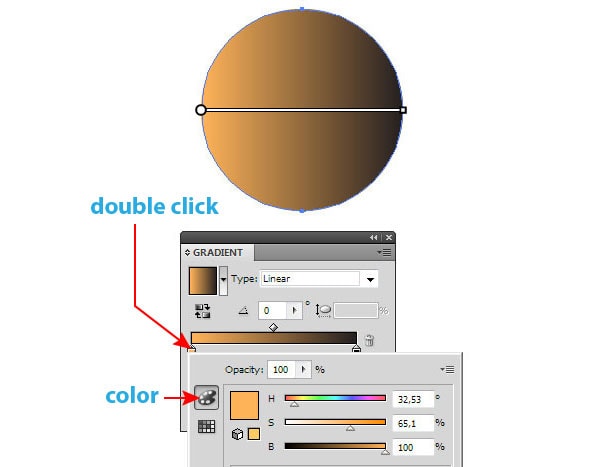
Notwithstanding, either by double-clicking on the Color Stop, it opens the Colors or Swaths panel right in the Lean panel If you work in Adobe Illustrator CS4 – CS6. Now you can mix colors, or choose a color from the available samples.
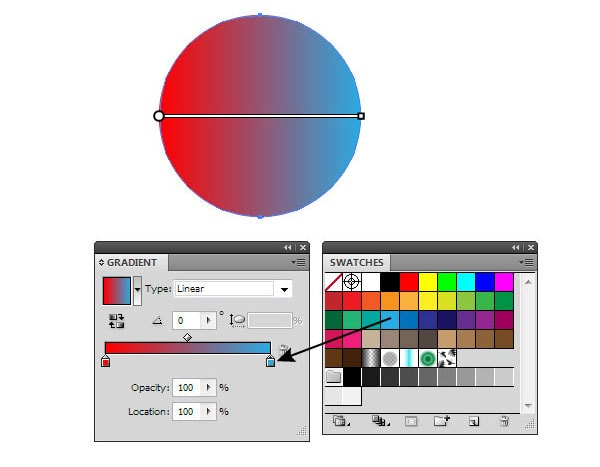
You can also drag colors from the Bands panel on any Color Stop to change its color or to breed a new Color Stop.
To change the color of the Color Stop, you can also use the Eyedropper Tool (I). Cherry-pick one of the Color Stops, take the Eyedropper Tool (I), hold Shift, and take a color from another object that has a solid or cant fill. In the same way, you can also take colors from bitmap images or cant mesh objects.

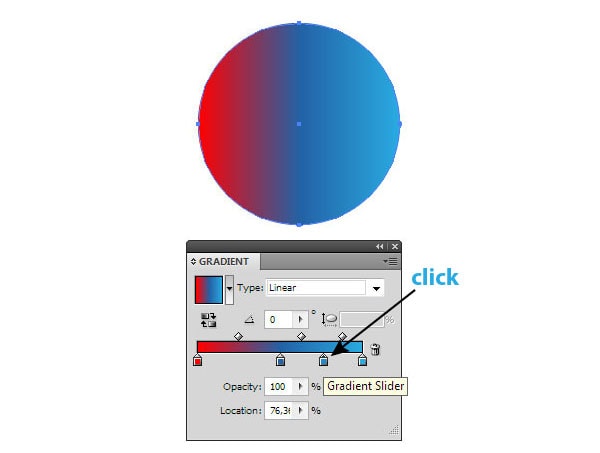
To catalyze a new Color Stop you just need to click on a blank area of the slider in the Grade panel.
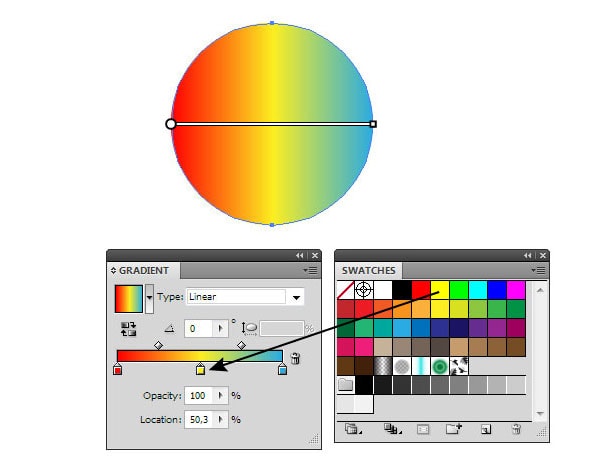
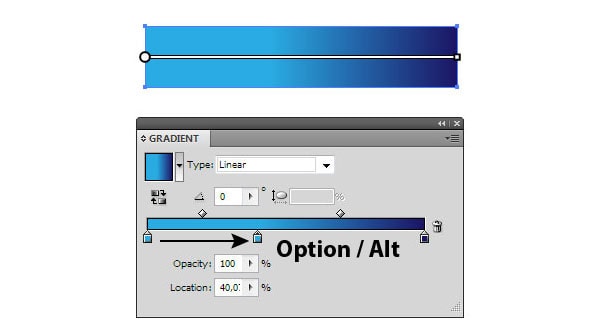
You can also duplicate the Color Stop, to do this, drag it to the side, holding the Option/ Alt key.
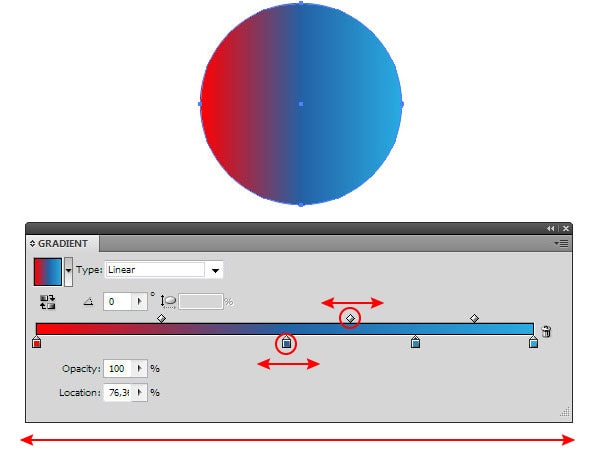
By moving the Color Stops and Midpoints, you can achieve the asked color distribution. In practice, your hourly need to work with complex grades that have a lot of Color Stops. For the convenience of working with cognate grades, simply extend the Grade panel.
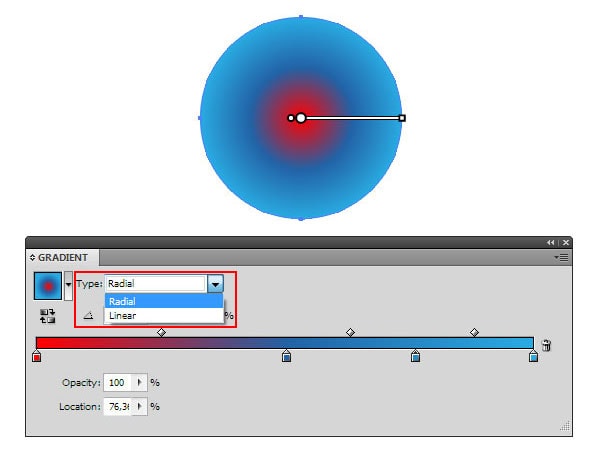
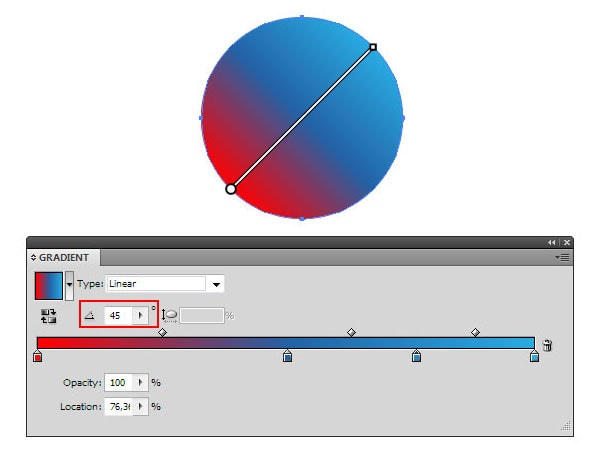
In the Grade panel, you can also cull the type of grade …
.to set its angle …
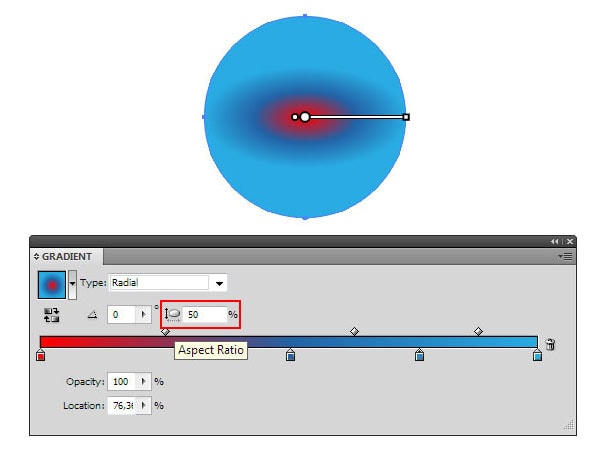
set the Aspect proportion for the radial lean that will metamorphose it into an elliptical bone …
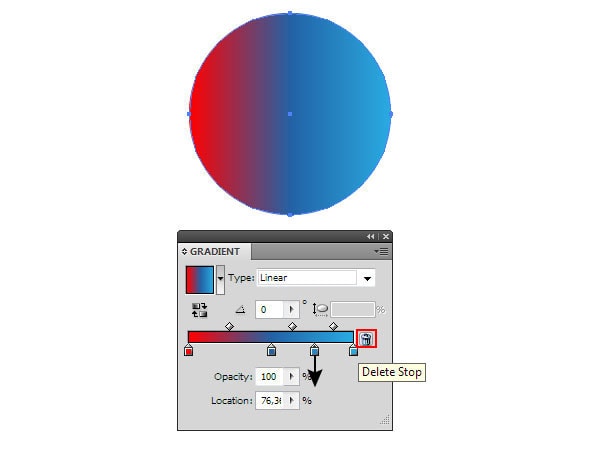
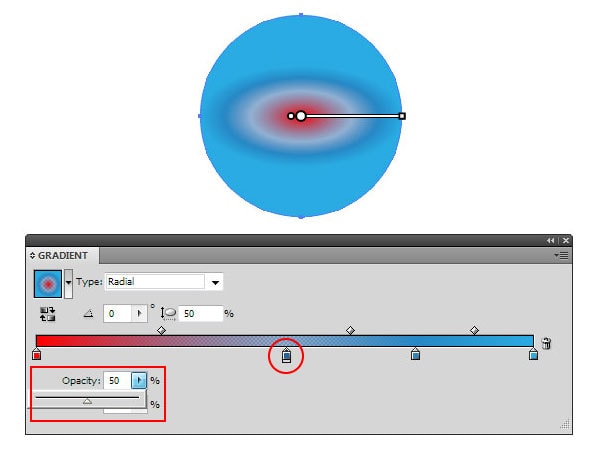
to reduce the nebulousness of the Color Stops ( available for freaks of Adobe Illustrator CS5 – CS6) …
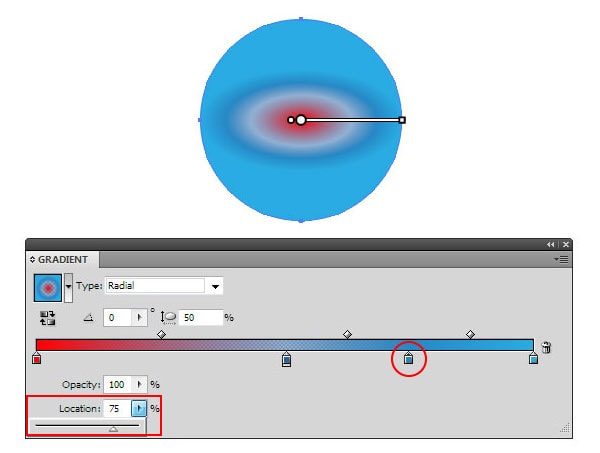
and to set a more accurate site of the opted Color Stop.
Notwithstanding, either you can control the diagonal directly on the object using a Diagonal Columnist.
If you take the Gradient Tool (G). You can move it, change the angle and move the Color Stops.
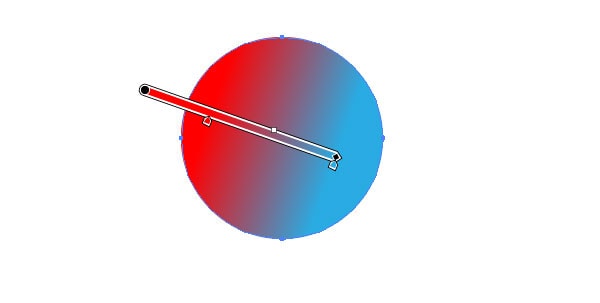
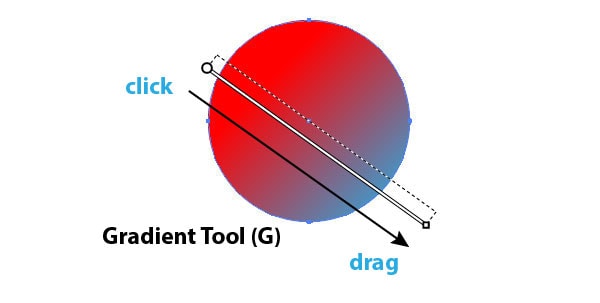
With the help of the Gradient Tool (G), you can set the angle, direction, and length of the incline using click and drag methodology.
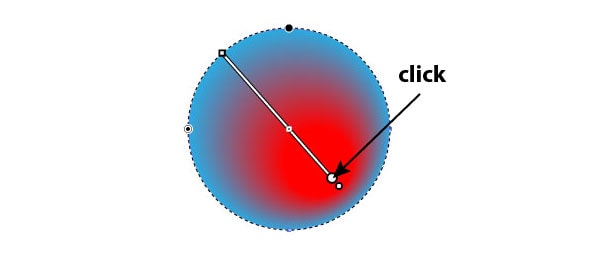
Notwithstanding, you click on any place with the help of the Gradient Tool (G), either the center of the incline will be moved to this place, If after you do a radial incline.
Of course, in the paper about the pitches, I should say that in Adobe Illustrator CS6 we’re suitable to apply an upgrade to a stroke. This wadding has three types upgrade within a stroke, upgrade along stroke, upgrade across stroke.
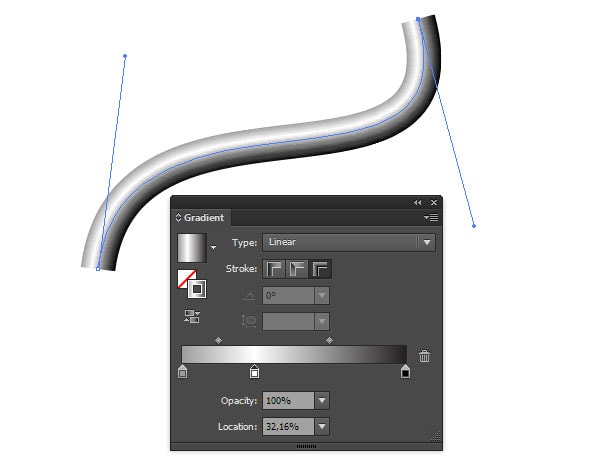
And I’ve before used the new touch several times in practice.

That’s about all I know about the controlling of lean fills. But that’s not all I want to tell you a moment. I’m hourly asked the same question in what cases and what kind of lean effect should be applied? It depends on several factors:
- The shape and point of the light source;
2. The form of the illuminated object;
3. The presence of answers;
4. Material of the illuminated object (although this factor doesn’t affect the shape of the lean, but only on the dissimilitude of the colors and the position of color stops, that means on the smoothness of the transitions between colors).
Does it sound complicated? Let’s take a look at the prior mentioned in practice.
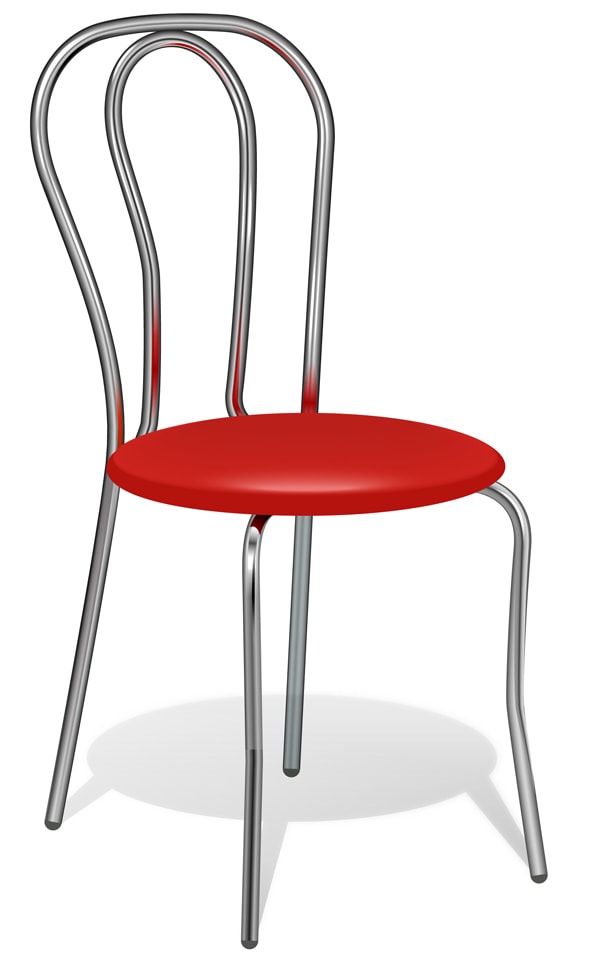
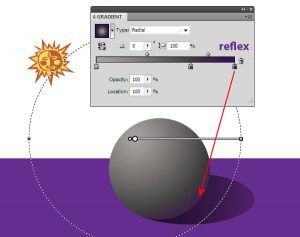
The object is a plastic sphere that’s illuminated by a point light source. The object is located on a polychrome background.
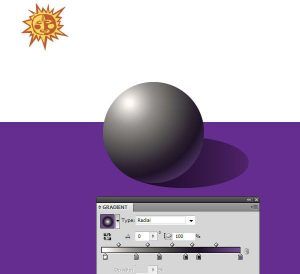
To fill such an object, use a radial lean, the center of which move towards the source of light. Don’t forget about the reaction on the shell area, which must be the same color as the background, but a darker shade. Presently I would like to recommend you to start coloring objects only after you’ll engender the background of the illustration. This will allow you to choose the right color intensity, the direction of the leans, and reaction colors.
When illuminating the interior sphere, we need to use further varying colors and add some new color stops to put color transitions.
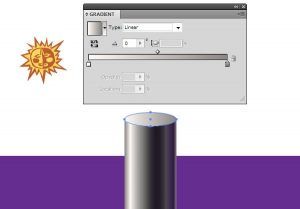
The object is an interior cylinder.
In this case, we need to use a straightaway slant.

The airplane area can be filled with a straightaway or radial slant, it all depends on what effect you want to achieve.
In order to add volume to more complex objects, we will need to combine several inclinations, using equivocation masks and inclination noose. And all this will be argued in our ensuing tutorials. Let moment’s tutorial be a good foundation for exploring the new material. (Youtube), (Facebook)